
Fast access to frequently used reports is a simple way to increase productivity. By adding IBM Cognos Analytics reports to the Pronto Xi ERP Software Menu the user experience is enhanced and easy navigation is provided for access to favourite reports.
To add a Cognos report to the Pronto Xi Navigation Menu follow the steps below:
Capturing the Report URL for use in Pronto Xi ERP
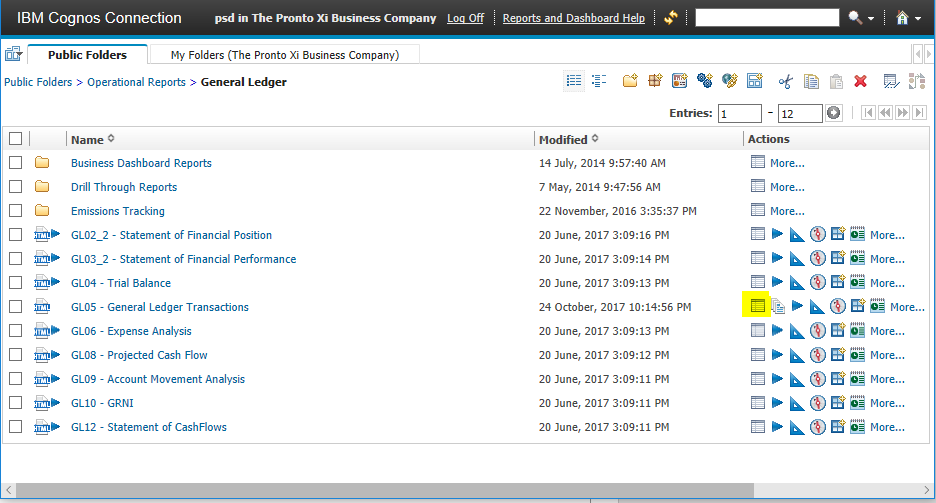
- From IBM Cognos Connection, locate the report that you wish to add to the menu.
- Click SET PROPERTIES for the desired report.
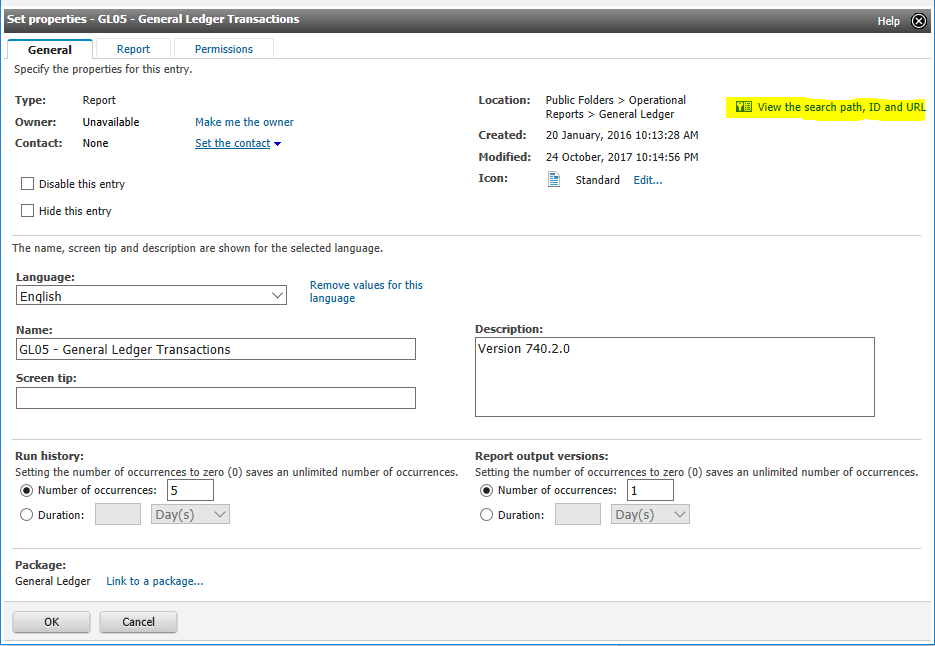
- From the General tab, click the View the search path, ID and URL link.
- From the View the search path, ID and URL screen, copy the FULL link from the Default Action URL field by selecting the content and pressing CTRL+C on your keyboard.
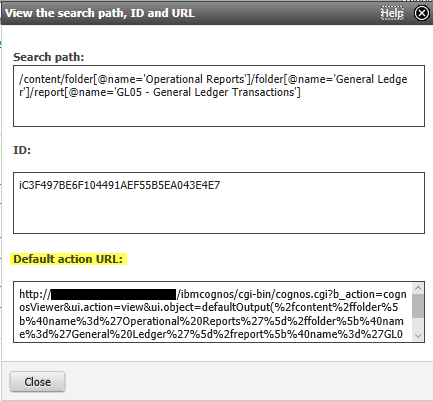
- Paste the Default action URL into Microsoft Word, Notepad or other text editor by pressing CTRL+V on your keyboard. The copied text should be similar to:

- In the text editor, modify the URL by replacing the server name with the text “DUMMY_SERVERNAME” as follows:

| Important Note:
The variable “DUMMY_SERVERNAME” allows the report to be run in any selected Pronto Xi company – without having to reset the URL.
|
Assigning the System Module & Function for the Cognos Report
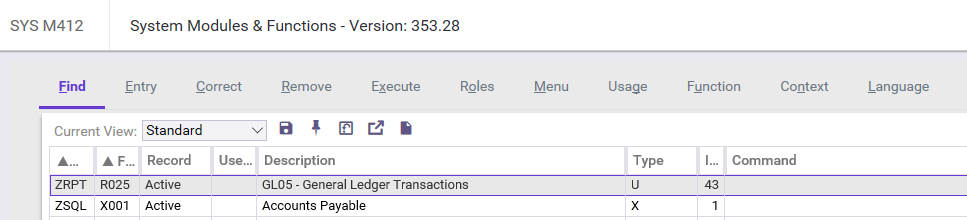
- In Pronto Xi, navigate to Administration > System Administration > System Modules & Functions (SYS M412)</span
- Click ENTRY.
- Follow the steps to assign a module/function to the report:
- In the Module field, assign a code for access to the report, keeping consistent with existing report entries. As a note, custom items are normally preceded with the letter Z. For example, ZUSER or ZRPT. Press ENTER.
- In the Function field, assign a unique code keeping consistent with existing entries. Press ENTER.
- In the Description field, enter the title of the report. Press ENTER.
- In the Type field, enter U (URL). Press ENTER.
- In the Icon field, select an icon, or simply press ENTER to choose the default selection.
-
- Continue to hit enter until the Module Function and URL Setup screen appears.
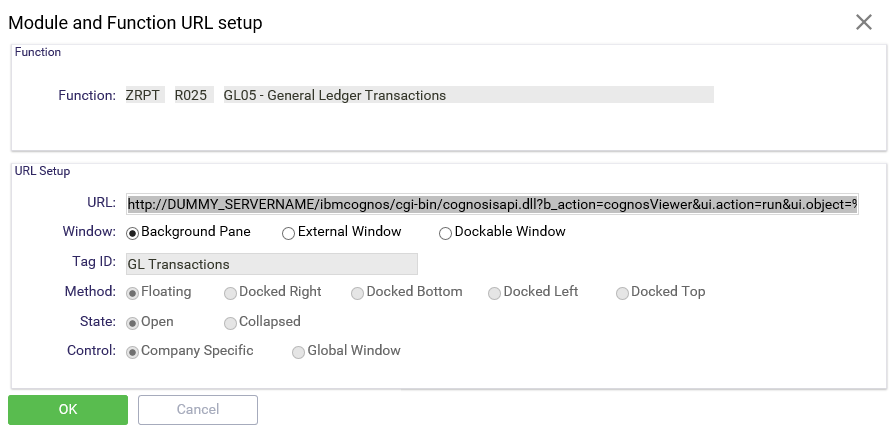
- In the URL field, paste the modified URL from the text editor.
- In Window options, select Background Pane so that the report appears within the Pronto environment screens.
- Click OK.
Final Setup Steps in Pronto Xi ERP
Two final steps complete this configuration:
- Adding the Function to the Pronto Xi Navigation Menu
In Pronto Xi, navigate to Administration > System Administration > Menu Structure Maintenance (SYS M393). Create the menu item for the report or simply add the new report to the Favourites menu for select users.
- Applying Security
Ensure that the new Module/Function assignment is applied to security roles of users who will be accessing the report.
Once these last steps are complete, the Cognos report should now be ready to be viewed directly from the Pronto Xi Navigation Menu.
Continue to visit our blog for more information about Pronto Xi and IBM Cognos reporting. PSA ERP consultants contribute tips and articles to our Insight page to help empower Pronto Xi users in completion of their daily tasks.
